This information involves the City of Tshwane, e tshwane login Portal: www.e-tshwane.co.za. It also contains the organization’s contact address and the official website. Kindly check below for more details.
The City of Tshwane (e tshwane) Career Login page on the Tshwane website is used by external applicants to register and apply for advertised posts at the City of Tshwane.
Users must register and confirm their registration using the URL in the correspondence email that will be sent to their email addresses after registration.
* Please take note of the following:
- Always make sure that “Pop-up blocker” is off as most screens display in separate windows.
- The only compatible browser to use is Internet Explorer version 8 and above. If any other browser is used, you may not be able to get the desired results, or you may not be able to access the system.
- Complete all the required fields, especially those marked with an asterisk* as they are mandatory.
- Always logoff when using public computers, to secure your personal details.
- Make sure that you adhere to the rules and requirements when setting a new password, eg combining capital letters, numerals and/or special characters.
HOW TO ACCESS THE CITY OF TSHWANE PORTAL TO LOGIN OR REGISTER
City of Tshwane Registration Process
- Log in to Tshwane’s website: www.tshwane.gov.za. Please read the Data Privacy Statement (terms and conditions) before continuing.
- Click on Continue at the bottom of the Data Privacy Statement screen
- IMPORTANT NOTICE: If you have registered on the e-Recruitment system before a new vacancy is published, your details are no longer available on the system, and you must please register again.
- Click on the Register button
- Enter the following applicant data for registration:
- First name
- Cell phone number
- Last name
- User name
- Password
- Repeat nassword
- E-mail address
- Repeat E-mail address
- Accept the Privacy Statement by clicking on the checkbox
- Click on Register
- NB: An email will be sent to your email address (the address you specified on the registration page)
- External applicants must confirm their registration using the link in the email.
- Click on the link received in the email for confirmation.
- Click on Personal Career Pages to login.
Create/Maintain Profile
- Login to access the Maintain Profile
- Enter your user name (which you received in the email)
- Enter the Password that you created during registration
- Click on Log On
- Click the Candidate Profile tab
- Complete the Personal Data (applicant) fields.
- Complete Residential Address and Postal Address (if available)
- Select the Preferred Address to use for correspondence
- Enter your Communication Data
- Select Preferred Telephone Number
NB: Only enter the Internet References if you know the URL link to access your reference profile. If you do not know the URL link, do not enter or select any information in the fields. - Click on Next Step or click on
- Click Add to add your Education details:
- Educational institution: Enter the name of the institution where you studied.
- Start Date and End Date: The period of your studies at the above institution.
- Country: Select your county from the drop-down list.
- Region: Select your region from the drop-down list.
- Location: Enter the name of the town/area where the institution is situated.
- Education Type: Select the type of education from the drop-down list.
- Education Level: Select your level from the drop-down list.
- Field of Education: Select your field of education from the drop-down list.
- Highest degree of education: Click on the text box only if this qualification is the highest level you have achieved to date.
- Subject: Enter the subjects you studied.
- Grade: Enter the highest Secondary Grade you have passed.
- Description: Enter a description of your qualification
- Click on OK .
- Click on Next Step or .
- Click Add to add your work experience .
- Employer: Enter the name of your current/last employer.
- Not Under Notice: Click the checkbox if you are still employed, ie if you have not resigned. Once the checkbox is ticked, the End Date field will not be displayed, meaning that you only have to fill in the employment Start Date.
For any position that you previously occupied, perform the step below and continue with the rest - Start Date and End Date: Your period of employment.
- Country: Select from the drop-down list.
- Region: Select from the drop-down list.
- Location: Enter text
- Industry: Select from the drop-down list.
- Functional Area: Select from the drop-down list.
- Hierarchy level: Select from the drop-down list.
- Job Title: Enter text (Make sure to enter the current job title)
- Description: Enter a summary of the job description of your current position.
- Click OK .
- Click Next Step or .
- Select the relevant tab to add the qualification, eg Certificate, Diploma, Degree,etc
- Other Qualifications: Enter your qualifications.
Make sure to enter your qualification under the correct qualification tab - Click OK .
- Click Next Step or .
——————————————————————————————————————————–- Interest Group: Select from the drop-down list.
- Salary expectations: Select the currency and amount from the drop-down list.
- Contract Type: Select from the drop-down list.
- Employment Fraction: Select from the drop-down list.
- Willingness to Travel: Enter the travel % of your preference.
- Willingness to Relocate: Select from the drop-down list.
- References: Enter your references and referees in the area.
- Click on Employment Preferences
- Click Add in the Industry, Functional Area and Hierarchy Level and select the prefered data from the drop-down list.
- Click on Desired Work Location .
- Click Add and use the drop-down list to select.
- Select the Country and Region you desire from drop-down list and enter location text.
- Click Transfer
- Click Next Step
Read the information next to the checkboxes and make sure that they are all ticked. - Select the Release profile checkbox .
- Click Complete .
A message that indicates that your profile is released, will be displayed. Applicants are not required to attach any documentation, such as CVs, Qualifications, etc – shortlisted candidates will be requested to bring them along when invited for the interview.
How to Login as an Existing User
- Open your internet browser e.g. Internet Explorer, Chrome, Firefox, etc.
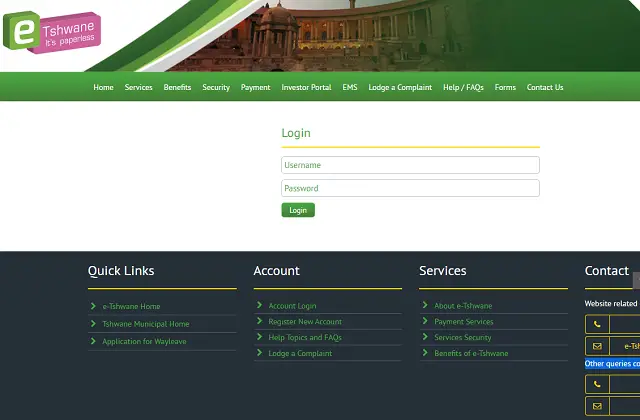
- Go to e tshwane Login Portal and click “Login”
Forgotten your Password?
- To reset your password, fill in your registered email address and reset your password by clicking forgot password on the login page.
CITY OF TSHWANE ONLINE LOGIN PORTAL
- City of Tshwane Login Portal: https://www.e-tshwane.co.za/eTshwane/login
Don’t miss out on current updates, kindly like us on Facebook & follow us on Follow @Eafinder OR leave a comment below for further inquiries.